


For many photographers, the idea of creating dramatic flash portraits can seem a bit intimidating, especially when the sun is still out. Even those who have some basic flash photography techniques under their belt might avoid this style of portraiture because of its supposed complexity.
The truth is, however, that using flash to create dramatic portraits is now easier than ever. In fact, the process can be broken down into a simple four-step framework, also known as the C.A.M.P. Framework.
Whether you’re just beginning your photography journey or you’ve been at it awhile, you can use this framework to streamline your workflow and take the mystery out of creating dramatic flash portraits.
Let’s get started.
What Is the C.A.M.P. Framework?
In technical terms, the C.A.M.P. Framework is a systemized process for photographers that works to pair their artistic abilities with their technical understanding of photography. Put simply, the C.A.M.P. Framework offers an easy workflow that photographers can use time and again to create with intention and consistently take better pictures.
Here’s a quick breakdown of the C.A.M.P. acronym:
- C - Composition: Before you pick up the camera, compose your shot. Survey the location and start to identify elements that you want to incorporate into the scene. Consider camera placement and angle, focal length, and compositional elements (leading lines, foreground elements, etc.). It’s also helpful to imagine what the subjects will be doing in the scene to make decisions regarding other elements you want to use.
- A - Ambient Light Exposure: The “correct” exposure for a scene depends on what you want the scene to look like. After composing the shot, dial in the ambient exposure to reflect the mood you want to convey. Will it be dark and moody or bright and airy? That’s up to you.
- M - Modify or Add Light: With the ambient exposure set, it’s time to decide whether we need to add more light or modify the existing light with a reflector, scrim, etc. If we decide to use flash and add more light, we’ll do so one light at a time. Putting in the time to light our subjects “correctly” at this phase (based on what we want the shot to look like) will save time in post.
- P - Pose & Photograph: Last, but not least, we need to direct our subjects into poses and capture photos.
Using the above framework, let’s capture some dramatic flash portraits.
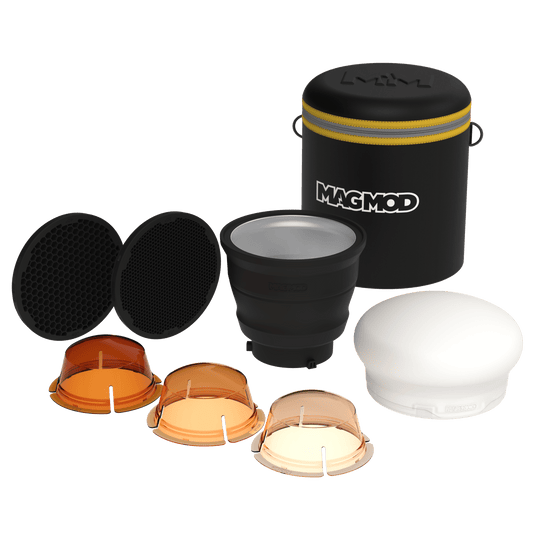
Gear Checklist
Here’s a list of the gear we’ll need to create our dramatic flash portrait:
- Camera with the option to manually set exposure
- Lens (any focal length will do)
- One off-camera flash
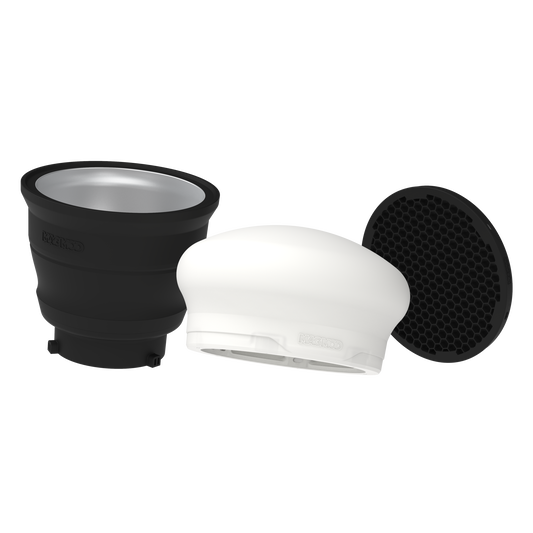
- One MagGrip 2
- One MagGrid 2
- One MagSphere 2
- One light stand
Tip 1: Compose the Shot

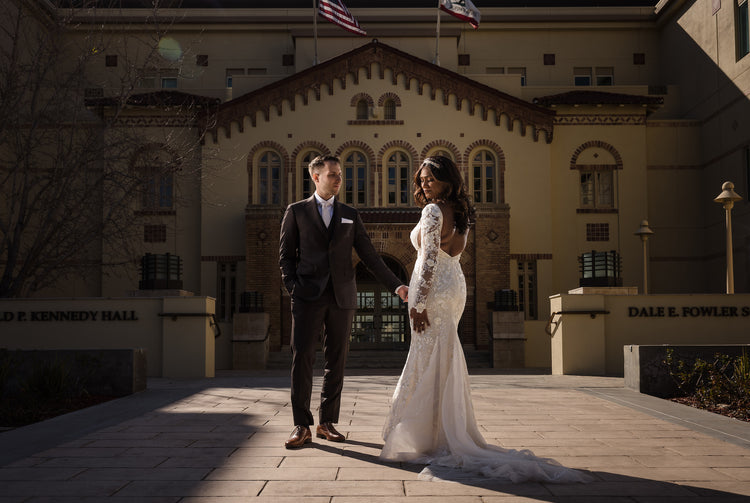
One of the first things you should do when arriving on-set is look for an ideal backdrop. For this particular location, the entryway to this building at Chapman University (see above) stood out for its bold and symmetrical design.
It’s always a good idea to start off with some test shots to get an idea of how you might frame the image and ensure you have adequate space for your subjects and whatever action or pose they might do.
Tip 2: Dial in the Ambient Light Exposure

Once the composition is good to go, it’s time to dial in the ambient light exposure. Because this will be a dramatic flash portrait, the ambient exposure should fall on the darker side. By taking a second test shot, you should be able to make adjustments and get the exposure where it needs to be.
For the shot above, we just needed to adjust the aperture from f/5 to f/11. If the final image calls for a wider aperture, perhaps because you want a shallow depth of field, adjust the shutter speed or use an ND filter (3-5 stops) to get an adequate exposure.
Just remember that for darker, dramatic portraits, the ambient exposure will need to come down and the flash power will go up. Adversely, for more natural looking images made with flash, keep the ambient exposure brighter and use less flash power.
Tip 3: Modify or Add Light
Before adding any lights or modifying the existing light, place your subject(s) into the scene. You will need them in place to determine how to move forward with the lighting. The subjects don’t need to be fully posed, but they should stand roughly where you intend to place them for the final image. For this shot, I placed the couple in a “reverse” pose with the bride’s back facing the camera. They’ve been carefully positioned to complement the symmetrical backdrop, even though their pose is not necessarily symmetrical.
Mind the Existing Light Direction

The sun, which just peeked over the top of the buildings to camera left, provided a nice kicker or edge light on the couple. Try to follow the existing light direction when deciding where to place your key light so that the added light doesn’t look out of place.
Add One Light

After taking another test shot with the couple in the frame, it quickly became apparent that adding flash would help make the subjects pop in this dramatic portrait.

Minding the existing light direction, we placed an AD 200 flash off to the left side at a slightly elevated position to match the angle of the sun and aimed it directly at the bride.

The goal in terms of positioning the light off to the side of the bride was to get a Rembrandt light pattern on the bride’s face. This light pattern features a triangle shaped light over the cheek and eye that is opposite the light position. As the name suggests, the famous painter Rembrandt often used this lighting pattern for his portraiture. It’s a favorite for portrait photographers, too.
Modify the Added Light as Needed
Different photographers will have varying opinions on where to start in terms of flash power while taking test shots. If you don’t already have a preference, start with full power and go from there.

The initial test shot, which features no modifiers, yielded nice results out of the gate. Still, while the bare bulb test shot represents a solid start, some mindful modification can take it up a notch. Just as you add only one light at a time, you should also only add one modifier at a time until you’re well versed in how they will affect the lighting.

Starting the modification process for dramatic flash portraits with a MagGrid 2 will help minimize light spill, giving you more control over how the light falls across your subjects as well as the background. You’ll notice in the image above that most of the added light from the flash is now concentrated on the bride.

Next, adding a MagSphere 2 will help soften and diffuse the light, which will look more flattering as it falls on the bride’s face. Because the light source is small, it still creates a hard edge, but the MagSphere works well to soften that up a bit.
Adjust Exposure as Needed

You’ll notice that each time you add a modifier, it will cut down the light output from the flash. Be sure to adjust your exposure as needed to compensate for the light loss. For this scene, a quick aperture adjustment from f/11 to f/9 worked well to adequately brighten up the scene.
Tip 4: Pose and Photograph Your Subjects for Dramatic Flash Portraits
The reverse pose worked well to show off the back of the dress and feature the couple in a unique way. However, after putting in work to set up your shot, don’t just take one photo and call it a day. Shoot from different angles (wide, medium, and tight), and direct your subjects into different expressions or actions (also called microposes) to add variety to the set. Some examples include asking the couple to kiss, to pull back and look at one another, have subject A look at the camera while subject B looks at subject A, and so on.
Please note, if you take some wider shots and notice the flash in the frame, you may need to capture some plate shots to make it easier to edit the flash out of the scene in post via a composite. If you have an assistant, capture the initial shot and then ask your assistant to remove the flashes so that you can hold your same position and then capture the plate shot. On the other hand, if you’re shooting solo, you may want to use a tripod to get the shots you need in order to create a composite.
Bonus Tip: Add a Second Flash

While the use of one flash can get the job done for this type of dramatic flash portrait, adding a second flash for a rim light can take it up another level. Because it was bright out, we set this second flash to full power. It’s like the saying goes, “When in the sun, one over one.”

For the short time it takes to throw another flash on a light stand and equip it with a MagGrid 2 and MagSphere 2, the results are more than worth the effort. You can see in the before and after images above how the second flash added a nice edge light to the groom as well as the bride and helped separate them from the background.
Here are the final shots:

Conclusion
I hope you found these tips for creating dramatic portraits helpful. It’s amazing what a difference a simple framework and easy-to-use tools like MagMod modifiers can make to streamline our workflow and boost the quality of our images. This holds true whether we’re shooting bright and airy shots or capturing dramatic flash portraits.