
It’s a great time to be a photographer interested in off-camera flash photography. The availability of options is at an all-time high and there are several viable third party brands that have more feature offerings at a lower price point than first party models. Still, with all these strobes and multi-purpose lighting products, speedlights remain an essential piece of kit for location lighting. In this article, Magmod Ambassador Justin Haugen of Justin Haugen Photography will demonstrate three ways to use a simple speedlight for big results.
1. Shoot Epic Sunset Portraits
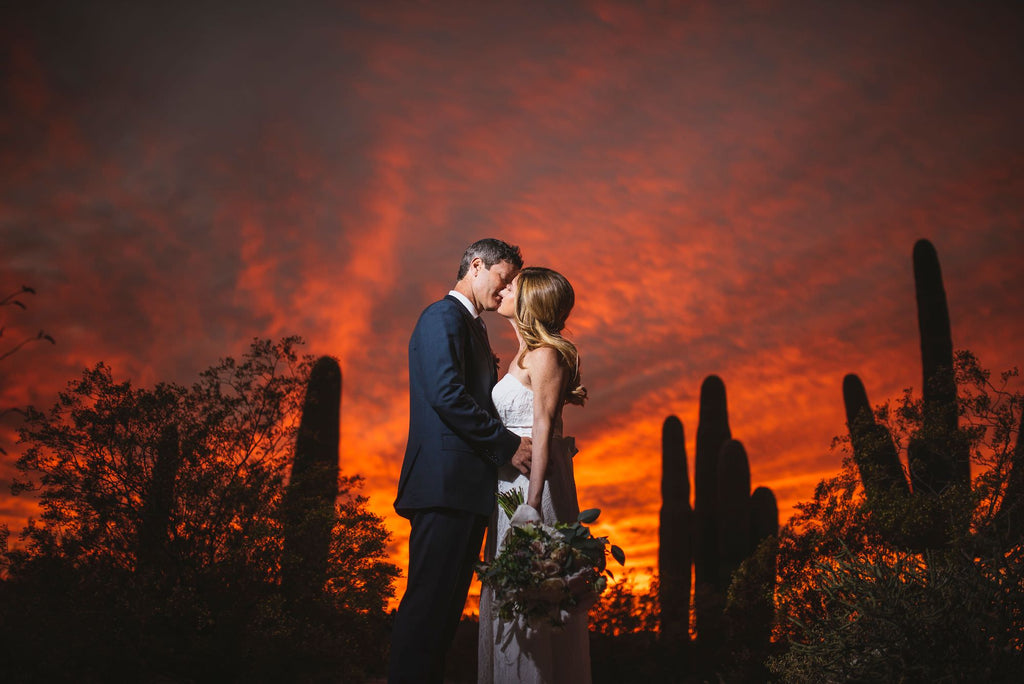
There are a few ways to approach this lighting scenario in the above image without involving a flash. You can meter for your subjects, effectively blowing out the highlight in the process and losing the tones in the sky, or underexpose the scene to silhouette the subjects against that backdrop. The silhouette approach is the first step to reaching the results above.
It’s only in the absence of light on our subjects that can we make decisions about how to creatively light them. Using a single speedlight paired with a MagGrid and MagSphere and a Full CTB Gel (color temperature blue), he was able to get a circular pattern of light on his subjects with a very pleasing shadow transition as the light feathers off toward their lower bodies. He positioned the flash just out of frame, camera left about 5 feet from the subjects, 7 feet high and angled at a 30-degree angle at his subjects’ heads. The position of the flash is important here because a camera right position would have lit the back of the brides head, leaving their faces in the darkness.
An interesting thing happens when you use a corrective gel for your sunset. Placing this blue toned light onto your subjects means you will have to make a white balance adjustment to your subject in order to make their skin tones look normal. You can make this adjustment in camera by using a custom Kelvin setting, or you can shoot in RAW and make this adjustment in Lightroom or your favorite RAW editor. A full CTB Gel requires a 10,000K white balance in order to neutralize the blue tones on your subjects. This global adjustment will also push the ambient white balance to 10,000K which made for a fiery orange tone in the last moments of this beautiful sunset.
2. Create One-Of-A-Kind Silhouettes & Rim-Lit Photos

Whenever we position the light source behind our subjects, we can make interesting silhouette images. If your subjects are in front of a nearby surface, you can turn the flash toward that surface for an easy silhouette. Sometimes we can even get this silhouette effect when there is no nearby wall to cast light on. If the humidity is high, the water molecules in the air will refract light and you’ll light up enough of the negative space around your couples to create a silhouette effect around their bodies.
In the image above, Justin placed the speedlight on the ground about 100 feet behind the couple at a 45-degree angle with a MagSphere and a Purple Creative Gel. “When I took this photo, I knew I had to get as much light as possible to the furthest reaches of the image. I wanted to see as much of the purple light reaching the outer edges of the oak tree hanging from its branches.” This meant he needed as much light spread as possible to accomplish his goal. Spread is affected by the distance of your light source to the subject, and in this case, the type of modifier he had on the flash. As an omnidirectional diffuser, the MagSphere increases the spread of light. Once he had the light set, he got into position crouched low to the ground to obscure the direct view of the speedlight.
With so much distance between him and the flash, he had to crank the speedlight up to full power and it still required a very high ISO with a wide open aperture in order for the light to be most effective in the exposure. “Noise in the image was of little concern as I knew I would raise the contrast of the image, pushing dark tones to their black point while increasing the impact of the light in the scene.”

“If your environment is lacking the humidity you need to achieve lighting results like this, you can introduce elements like smoke, dust, or products like Atmosphere Aerosol into the space between your subjects and the flash. A little bit of powdered chalk in the air can be that extra creative element your photo was missing.”
3. Turn One Light Into Many With Composite Photography

“It’s not lost on me that some of our readers are going to look at this photo and say I cheated, that this isn’t one light source. Really though, this photo employed the use of one speedlight and a very helpful lighting assistant. Composite photography is a creative way to get impactful results from a minimal kit.”
This photo requires a little bit of finessing between Lightroom and Photoshop and a steady hand while shooting to achieve similar results. He heavily underexposed the scene to darken the scene outside the window and to allow for the maximum impact of the speedlight to be observed in the final image. Once he was set and in position with his main subject in focus, he took 6 images without moving the position of the subjects or the camera. “My assistant was holding a speedlight with a stacked MagSphere on top of a MagGrid. The objective here is to control the spill of light to a very tight circular pattern, so no stray light bounces off of nearby surfaces or subjects.”
After each frame is snapped, have your assistant move to the next subjects, aiming the center of the flash at the eyes of each groomsman. Even if you’re a little unsteady and there is a slight variation from frame to frame, it’s easy to correct with ‘Auto-Align layers’ in the Edit menu of Photoshop. Photographers have falsely equated having more lights with getting big results. 90% of my OCF lit photography is easily managed with the use of one light. With clever vision and positioning, we can make images that draw our viewers into the most important part of a location lit portrait: the subject.
You can see more of Justin's work on his Website and Instagram.